Nails have become one of the best ways to express personal style, and one trend that continues to grab attention is jelly nails. Known for their glossy, see-through finish, they look almost like stained glass on your fingertips. The effect is playful yet chic, with a candy-like shine that can be styled in endless ways. Depending on the shades you choose, jelly nails can look subtle and natural, bold and colorful, or fun and artistic.
What makes them so popular is how versatile they are—you can keep them minimal with sheer pink tones or go all out with glitter, decals, or layered designs. They work for every season, every outfit, and every mood. Whether you’re new to the style or curious about Korean jelly nails, this post will walk you through what jelly nails are, how you can create them at home, the best colors to try, and some eye-catching designs that are trending right now.
Unlike standard manicures that use opaque polish, jelly nails stand out because of their transparent finish. The polish is sheer, yet colorful, giving your nails the appearance of tinted glass. The look first gained popularity in Asia, especially in Korea and Japan, where nail artists played with translucent layers and glossy textures. Today, jelly nails are everywhere—from Instagram feeds to runway shows. The best part is their versatility. You can keep them minimal with jelly pink nail designs for an everyday look, or layer on glitter and nail art for something more dramatic.
You don’t always need a salon to get professional-looking jelly nails polish. With a little patience and the right products, you can create them yourself.
Start by removing any old polish and cleaning your nails. Push back your cuticles, shape your nails, and buff them lightly so the polish goes on smoothly. Always apply a base coat before the color—this protects your nails and helps the polish last longer.
You can buy ready-made jelly gel nail polish, but if you don’t have one, it’s easy to create your own. Take a clear top coat and add a few drops of any colored polish. Shake it well, and you’ll have a translucent polish that works just like the store-bought kind.
For the best results, many people use jelly nails Korean gels, which are known for being thicker and glossier. They give that smooth “glass” effect without streaks.
The key to jelly nails is layering. Paint a thin coat of your jelly polish, let it dry, and then add another one. Usually, two or three layers are enough to give you that perfect see-through look. Seal everything with a shiny top coat.
When it comes to colors, jelly nails give you endless options. Here are six shades that always look fresh:
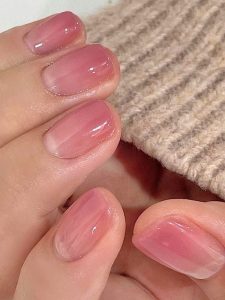
Soft Pink: Ideal for everyday wear, pink jelly nails are subtle, pretty, and suit any outfit.

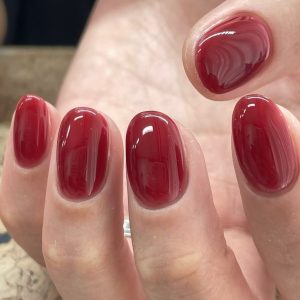
Ruby Red: Bright red in a sheer formula looks like candy apples—sweet and bold at the same time.
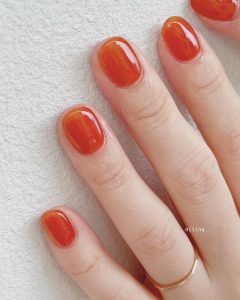
Citrus Orange: Perfect for summer, this shade adds a burst of energy to your nails.
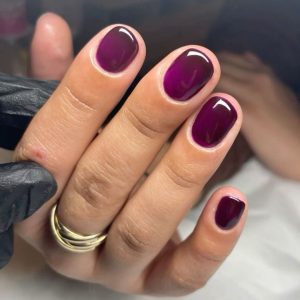
Deep Purple: Grape tones look playful but still elegant, especially when paired with silver glitter.
Aqua Blue: A refreshing choice that gives major beach vibes.

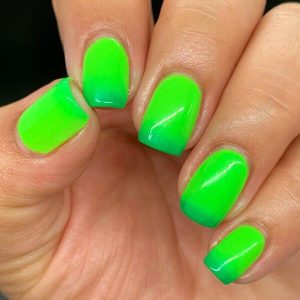
Neon Green: Eye-catching and fun, this color is great if you want your nails to stand out.
Korean jelly nails are known for their glossy finish, layered depth, and playful creativity. Unlike basic jelly manicures, the Korean version often adds dimension with decals, glitter, and smooth layering techniques that make nails look like shiny glass. Here’s a step-by-step guide to help you get the same effect at home:
Preparation is everything. Remove old polish, trim your nails to the desired length, and file them into shape. Square, almond, or rounded tips all work beautifully with jelly nails. Gently push back your cuticles, then buff the surface so your polish grips evenly. Always apply a thin base coat to protect your natural nails and keep staining away.
Tip: Use a rubber or gel base coat if your nails are brittle—it creates a stronger foundation for layers of jelly polish.
The secret behind jelly nails Korean artists create lies in the gels they use. Korean brands are thicker, self-leveling, and designed to create a smooth, cushiony effect. They don’t streak easily, which is important when working with sheer colors. If you can’t find these gels, you can still DIY by mixing a few drops of regular polish into a clear top coat for a jelly-like finish.
Pro tip: Invest in a good UV or LED lamp, as gel formulas need proper curing to set well.
Don’t rush the color application. Apply a thin coat of your jelly gel nail polish and cure it under the lamp. Repeat with two or three more coats until you reach your desired translucency. The charm of jelly nails is their see-through quality, so avoid making the polish too thick.
Tip: If you’re using a custom DIY jelly polish, test the opacity on one nail before applying to all. That way, you’ll know exactly how many layers are needed.
This is where the Korean style really shines. While the basic jelly manicure already looks sleek and modern, Korean nail artists often take it a step further by layering on details that add depth and personality. Instead of keeping the nails plain, they play with light, texture, and tiny accents that turn a simple manicure into a statement piece.
Think of jelly nails as a base canvas—transparent enough to let creativity show through, yet glossy enough to make every design pop. The translucent quality of jelly gel nail polish makes it perfect for layering with different materials without losing that juicy, glass-like effect. This is why Korean jelly nails stand out: they mix subtlety with bold artistic touches. Some options include:
Don’t be afraid to mix and match. Korean jelly nails are meant to be creative and fun!
Finish your manicure with a glossy top coat to lock in all your work. A no-wipe gel top coat works best since it stays shiny and smooth. Cure one final time, and you’ll have nails that look like stained glass candy.
Jelly nails aren’t just about color—you can get creative with designs too. Here are some fun ideas:
Natural Glow – Light pink jelly polish for a soft, glossy finish.
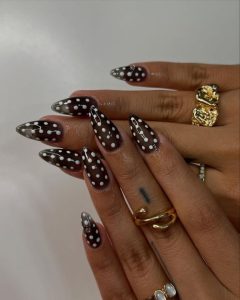
Polka Dots – Add dots with a thin tool for a playful touch.
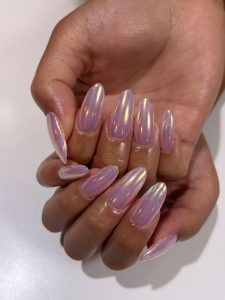
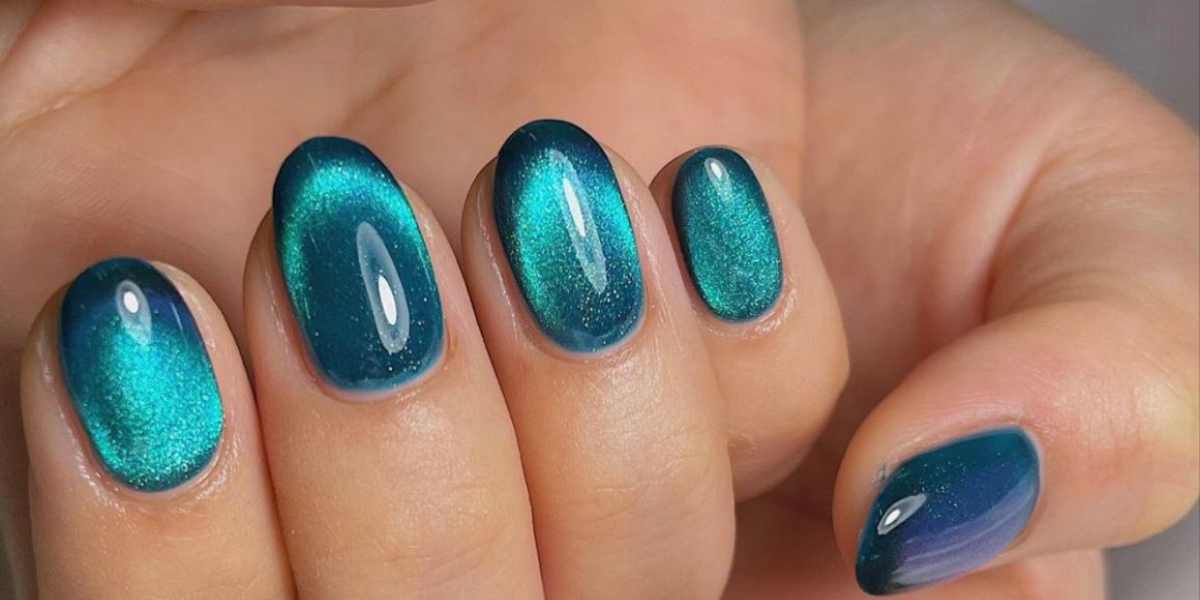
Glitter Cat-Eye – Combine jelly polish with glitter and a cat-eye effect for a sparkly look.
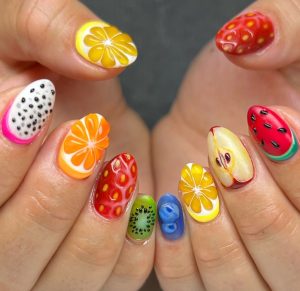
Fruit Popsicle Nails – Mix shades like orange, pink, and purple for a fruity vibe.
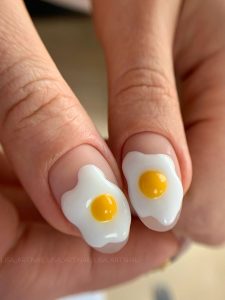
Egg-Inspired Art – Create quirky looks using clear builder gels for texture.
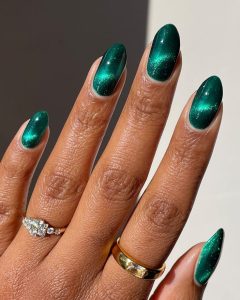
Mermaid Style – Teal jelly nails with shimmer for an ocean-inspired manicure.
Neon Barbie Pink – Sheer neon pink nails that are bold but glossy.

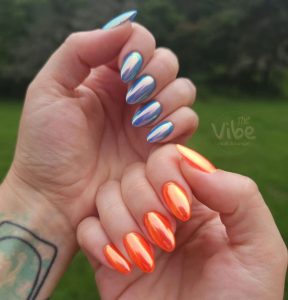
Fire and Ice – Paint one hand warm tones and the other cool tones for contrast.
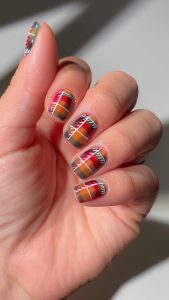
Plaid Patterns – Use stripes of different jelly shades to create a tartan effect.
Gemstone Nails – Emerald, amethyst, or quartz-inspired shades with a glossy finish.
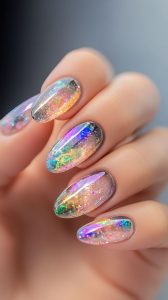
Rainbow Set – Each nail painted a different pastel jelly color for a cheerful, multi-shade look.

Jelly nails are more than just a trend—they’ve become a playful way to add shine and color to any manicure. From soft jelly pink nail polish that gives a natural glow to bold designs with glitter, decals, or chrome accents, this style offers endless possibilities. You can keep them simple for everyday wear or turn them into statement nails with fun designs.
The best part is how versatile jelly nails are. Whether you buy ready-made jelly nail polish or mix your own DIY version, it’s easy to create a glossy, see-through finish that feels fresh and modern. Their sheer layers and juicy colors prove that nails don’t always need to be opaque to look beautiful. With so many ways to style them, jelly nails remain one of the most exciting manicure trends around.
For more detailed guides and ideas check our detailed blog on nails.

September, 17, 2025

September, 1, 2025